

This is a write up on how to change the colour of your dash lights. Read on….
If in doubt of your abilities to do this don’t try, get a pro to do it (and charge you for it!) or ask me, i`m cheaper than anyone else by a long way!
Im a Panasonic engineer and work on plasma tv`s etc so the components here are actually huge to me, so much so I did the majority of this with a simple gas powered hobby soldering iron, but again this is second nature to me and I understand not everyone has the confidence to attempt this. But the fact is, its not hard or even a specialist thing to do. I did it with the gas iron to show it can be done without specialist gear.
Take photos as you go along, this will aide you on reassembly. And take a note of everything you remove.
To do this you need to swap out SMT`s . basically surface mount leds. they come in a variety of different colours. red, green, white, yellow, blue, amber (as the mini is standard), warm white, pink and purple.
these are the tools i used and what smt`s look like and a picture of the finished job.


First you will need to remove the modules you intend to change
I RECOMMEND YOU START WITH THE CLOCK IN THE ROOF
Why? It’s the simplest.
Remove the clock and then open it up. It has three SMT`s
Note the polarity while they are still on the board, there is a cut-out in one of the corners, this is the cathode (marked K for kathode on some of the boards) make sure when you replace them you get them the same way round, unlike a bulb they wont light if placed in reverse.
see later in the thread for pics of the clock opened up etc
Hers a pic of the finished clock

Next I did the tacho and speedo, if you have a centre mounted speedo the principle is the same.
First removed the two torx screws behind the tacho, drop the steering wheel to do this

Now unplug the green connector, and remove
and remove the Philips screws from the back

Unclip the front

you will be faced with this

unclip the lens from the white plastic and put somewhere safe

Now you need to removed the needles, be careful but they just need prising off.

Now unclip the white plastic from the board, turn it over and you will see the smt`s, I have marked the ones I wanted to change in the picture

Now the display needs to be removed, four metal clips and its off, there are 4 smts under here.

How to remove smt`s from the board, remember for the sake of this diy, and using bog standard equipment, we are using the ghetto method here! if i was to do it again i work use my very expensive gear.
i didnt have a free hand to take a photo but, Quickly heat one side and then the other while putting a small amount of force on the smt and it will pop right off! On this board the polarity is marked, “K” is the end where the cutout on the smt goes and “A” is the other end.
So now just go around and replace the ones you want to change,
How to fit smts, observe polarity!! if its your first go get a friend to help, hold the smt with tweezers,place the smt over the solder connections on the board and while you hold down the smt, dab the iron on one end, it should just attach easily, then do the same for the other end. Here you can see I have removed the smt`s and replaced the one in the top right.

Once you have them all done you need to reassemble, don’t forget to put this bit back, the reset button, the black ring goes against the circuit board.

When all is back together it should look like this.

Its not only the tacho and speedo that can be done.
Next I did the switch bank
Remove the downtubes from the centre console
Remove the 2 torx screws holding in the switches and remove the module.
Now unclip the back of the module, be careful here as all the parts of the toggle switches can drop out.


Set the front carefully to one side
Removed the white rubber sheet to expose the smts, replace as previously written, reassemble and its done.
Today I started on the air con unit, once removed from the dash lay it face down and remove the 4 torx screw, don’t undo the clips.

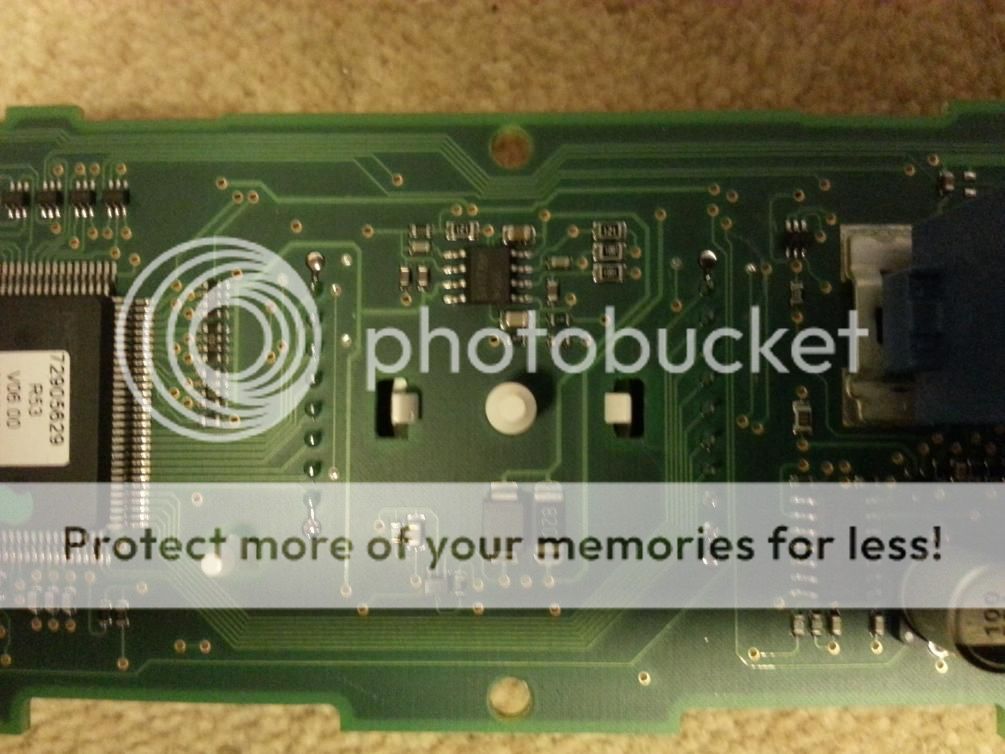
Now you can wiggle the back off and take out the pcb, you can see here all the smts you need to change, there are also some under the display so if you want that changed it will need to be removed.
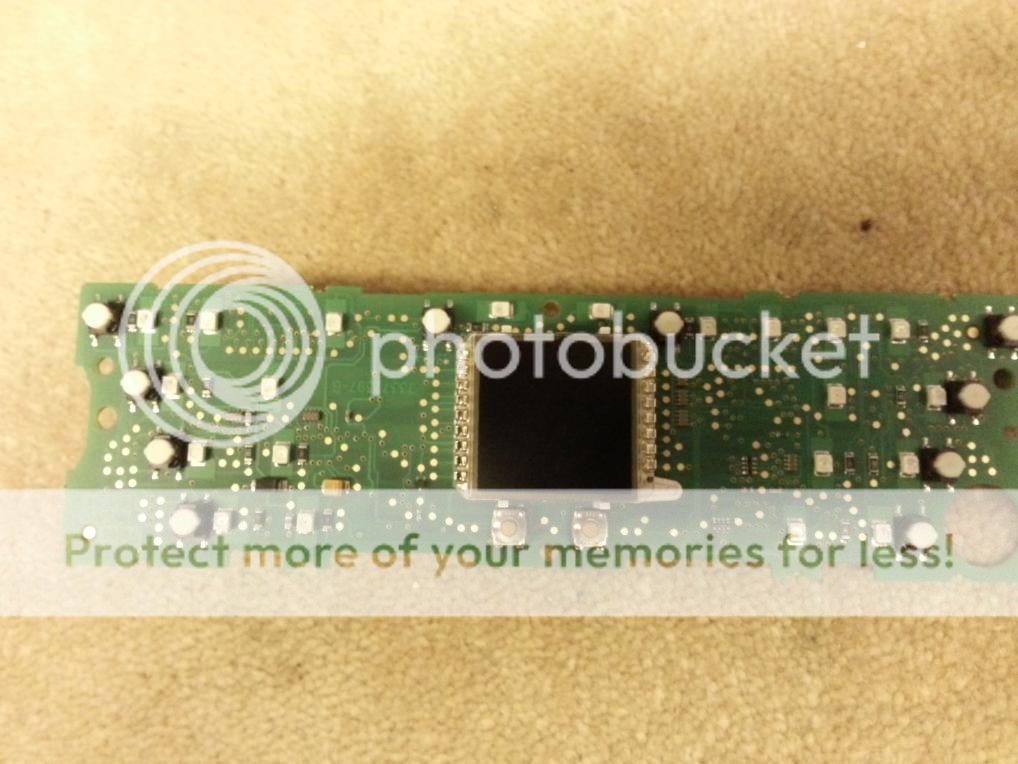
Pictured below are the connections you will need to desolder. When you start to remove the smt`s note the polarity as its not marked on the board!!
It helps if you have access to a workshop equipped with the tools needed. from this point on i used my workshop. With the vacuum gun its off in seconds with no mess at all. Reassemble when you have changed required smt`s.


Next I had a look at the sat nav unit. The dash trim needs to be removed to get at the screen, google dash trim removal, there are loads of guides for this. When you have it removed, take the ring off its face,and unclip the black plastic surround, unclip the fuel gauge and airbag light covers,

now we have a problem! The smt`s for the lights at the top (airbag etc) are as before,
the lower smt`s for the fuel gauge are much smaller!
if you have a r56 the fuel gauge in the centre speedo uses these smaller leds


if you have the chrono pack or the speedo in the centre of the dash, this can be done too, it will be similar in design to the tacho/speedo that i have but bigger!
If in doubt of your abilities to do this don’t try, get a pro to do it (and charge you for it!) or ask me, i`m cheaper than anyone else by a long way!
Im a Panasonic engineer and work on plasma tv`s etc so the components here are actually huge to me, so much so I did the majority of this with a simple gas powered hobby soldering iron, but again this is second nature to me and I understand not everyone has the confidence to attempt this. But the fact is, its not hard or even a specialist thing to do. I did it with the gas iron to show it can be done without specialist gear.
Take photos as you go along, this will aide you on reassembly. And take a note of everything you remove.
To do this you need to swap out SMT`s . basically surface mount leds. they come in a variety of different colours. red, green, white, yellow, blue, amber (as the mini is standard), warm white, pink and purple.
these are the tools i used and what smt`s look like and a picture of the finished job.


First you will need to remove the modules you intend to change
I RECOMMEND YOU START WITH THE CLOCK IN THE ROOF
Why? It’s the simplest.
Remove the clock and then open it up. It has three SMT`s
Note the polarity while they are still on the board, there is a cut-out in one of the corners, this is the cathode (marked K for kathode on some of the boards) make sure when you replace them you get them the same way round, unlike a bulb they wont light if placed in reverse.
see later in the thread for pics of the clock opened up etc
Hers a pic of the finished clock

Next I did the tacho and speedo, if you have a centre mounted speedo the principle is the same.
First removed the two torx screws behind the tacho, drop the steering wheel to do this

Now unplug the green connector, and remove
and remove the Philips screws from the back

Unclip the front

you will be faced with this

unclip the lens from the white plastic and put somewhere safe

Now you need to removed the needles, be careful but they just need prising off.

Now unclip the white plastic from the board, turn it over and you will see the smt`s, I have marked the ones I wanted to change in the picture

Now the display needs to be removed, four metal clips and its off, there are 4 smts under here.

How to remove smt`s from the board, remember for the sake of this diy, and using bog standard equipment, we are using the ghetto method here! if i was to do it again i work use my very expensive gear.
i didnt have a free hand to take a photo but, Quickly heat one side and then the other while putting a small amount of force on the smt and it will pop right off! On this board the polarity is marked, “K” is the end where the cutout on the smt goes and “A” is the other end.
So now just go around and replace the ones you want to change,
How to fit smts, observe polarity!! if its your first go get a friend to help, hold the smt with tweezers,place the smt over the solder connections on the board and while you hold down the smt, dab the iron on one end, it should just attach easily, then do the same for the other end. Here you can see I have removed the smt`s and replaced the one in the top right.

Once you have them all done you need to reassemble, don’t forget to put this bit back, the reset button, the black ring goes against the circuit board.

When all is back together it should look like this.

Its not only the tacho and speedo that can be done.
Next I did the switch bank
Remove the downtubes from the centre console
Remove the 2 torx screws holding in the switches and remove the module.
Now unclip the back of the module, be careful here as all the parts of the toggle switches can drop out.


Set the front carefully to one side
Removed the white rubber sheet to expose the smts, replace as previously written, reassemble and its done.
Today I started on the air con unit, once removed from the dash lay it face down and remove the 4 torx screw, don’t undo the clips.

Now you can wiggle the back off and take out the pcb, you can see here all the smts you need to change, there are also some under the display so if you want that changed it will need to be removed.

Pictured below are the connections you will need to desolder. When you start to remove the smt`s note the polarity as its not marked on the board!!

It helps if you have access to a workshop equipped with the tools needed. from this point on i used my workshop. With the vacuum gun its off in seconds with no mess at all. Reassemble when you have changed required smt`s.


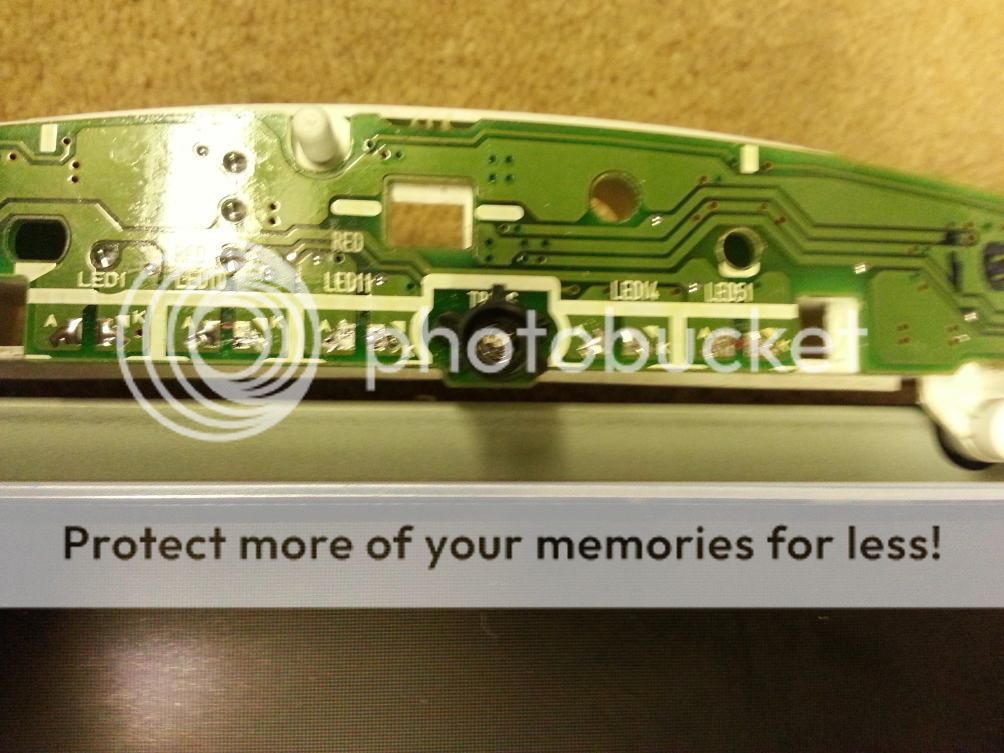
Next I had a look at the sat nav unit. The dash trim needs to be removed to get at the screen, google dash trim removal, there are loads of guides for this. When you have it removed, take the ring off its face,and unclip the black plastic surround, unclip the fuel gauge and airbag light covers,

now we have a problem! The smt`s for the lights at the top (airbag etc) are as before,

the lower smt`s for the fuel gauge are much smaller!
if you have a r56 the fuel gauge in the centre speedo uses these smaller leds


if you have the chrono pack or the speedo in the centre of the dash, this can be done too, it will be similar in design to the tacho/speedo that i have but bigger!
")


